We use cookies to make your experience better. To comply with the new e-Privacy directive, we need to ask for your consent to set the cookies. Learn more.


Courandair window blocker offers three configurations:
- A. Small opening angle with cat safety position (details)
- B. Wide opening angle (details)
- C. Two leaves mode (details)
Depending on the chosen configuration, and your window or door profile type and thickness, it will be necessary to adjust the clamp and flexible hose position in order to obtain maximum stability.
Ensure that the clamps are held securely on the window.
Use with caution in the presence of small children.
Keep out of reach of children under ten years old.
Product not intended for the safety of children.
Do not use in strong winds.
Protect from rain.
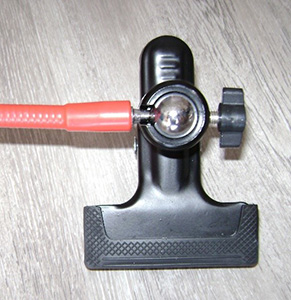
To ensure satisfactory grip, it is recommended to position the screw lock perpendicular to the clamp.
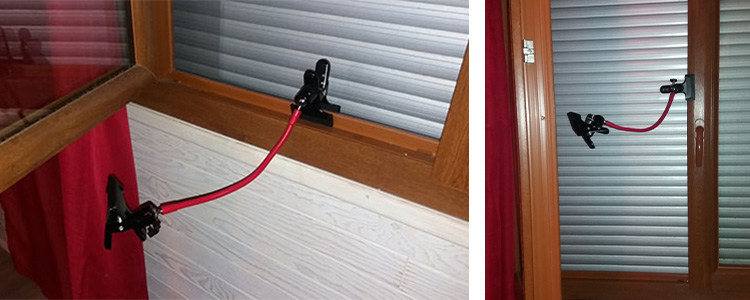
A. Install the window blocker to obtain a small opening angle
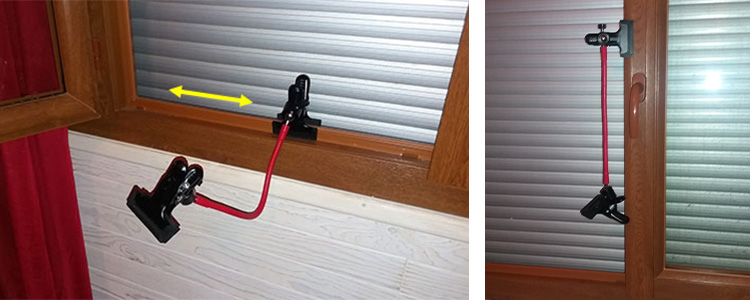
This configuration allows you to achieve an opening of a few centimeters and up to ten centimeters with great stability.
This allows you to block the passage of your pet when desired or to create a space large enough for entry and exit of your pet, both while also allowing for light ventilation of your home (e.g. During the winter).
-
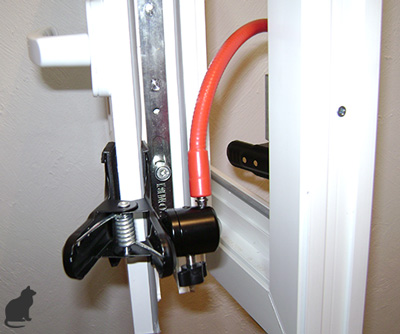
1. Position the hose inside the notch parallel to the clip’s rubber pads, then tighten the locking knob.
-
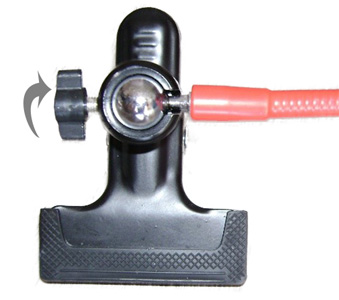
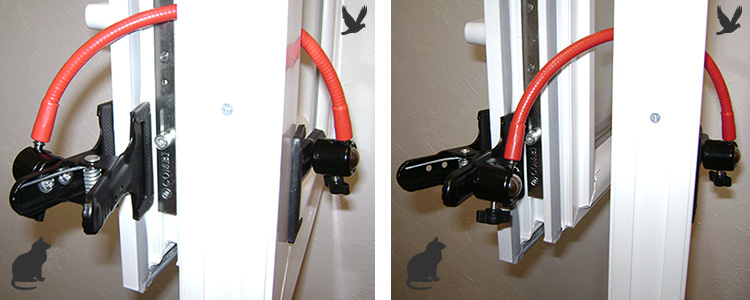
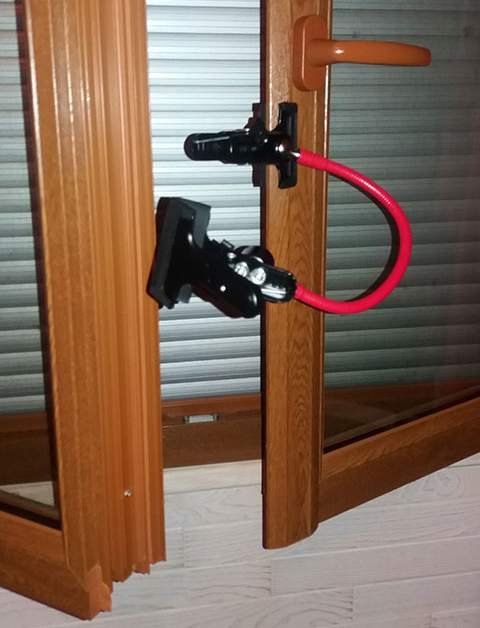
2. Position the first clamp on the closed leaf of your window or window frame. When placing the clamps, choose an area of thickness compatible with the opening capacity of the clamp. The ball joint should be oriented facing outward.
-
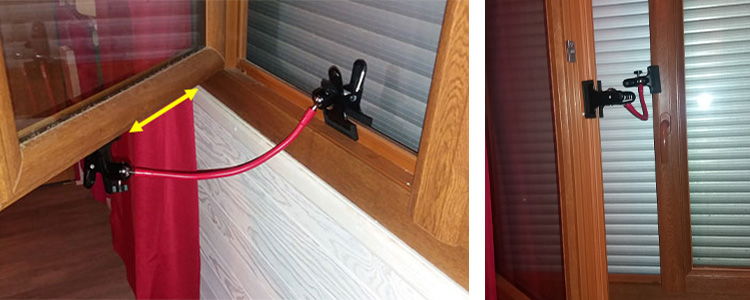
3. Bend the hose in order to obtain the desired size of window opening. Be careful not to bend it too much and to respect a sufficient radius of curvature. The two clamps must be parallel to the window frame. In order to achieve a smaller opening, the ball joint of the second clamp is preferably oriented facing inward (left photo). If a larger opening is desired the ball joint should be oriented facing outward. Also, note that in some cases your window thickness or handle dimensions may require you to place the ball joint oriented facing outward. Finally, tighten the ball joint locking knob of the first clamp.
-
4. Position the second clamp on the movable leaf, optimal thickness of your window being up to 6 cm, with the ball joint facing inward (left photo) or outward (right photo), and with the end of the hose in the notch. Next, adjust the position and tighten the knob to lock the ball joint of the second clamp.
Sequence of steps:

-
4.1 If a larger opening is desired, turn the clamp to have the ball joint oriented facing outward, and position it on the movable leaf. Bend the hose in order to obtain the desired size of window opening, then tighten the knob to lock the ball joint of the second clamp.
Sequence of steps:

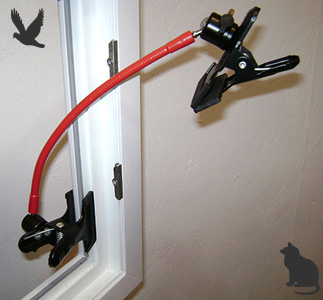
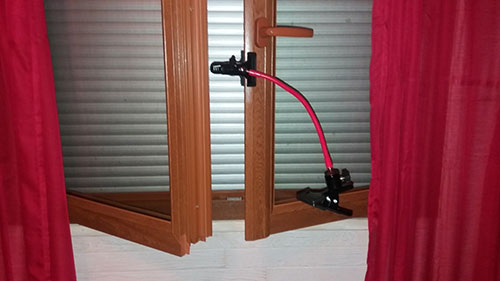
B. Install the window blocker to obtain a wide opening angle
This configuration allows you to achieve a large opening angle, up to and even more than 90°.
The opening angle can be adjusted by manipulating the extent of hose curvature and/or the position of the clamps.
This configuration will allow you to achieve a high level of ventilation.
1. Position the first clamp on the closed leaf or frame by choosing an area of thickness compatible with the opening capacity of the clamp. If you choose to attach the clamp to the frame, you can adjust the opening angle according to its position: the closer it is to the window hinges, the larger the opening achieved.
2. If necessary, adjust the curvature of the hose to obtain the desired opening. Be careful not to bend the hose too much and to respect a sufficient radius of curvature.
3. Position the second clamp on the movable leaf, on an area of compatible thickness, then adjust the position and tighten the locking knobs on each ball joint. The closer the position of the clamp to the window hinges, the larger the opening will be.
Sequence of steps:
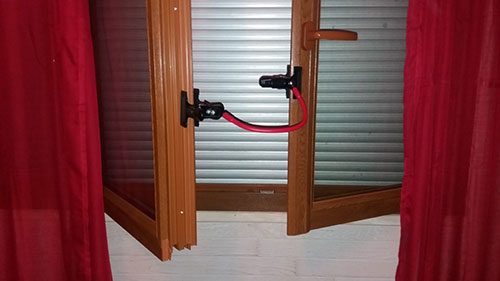
C. Install the window blocker on two leaves
This configuration allows you to keep both window leaves open simultaneously.
1. Position the first clamp on a leaf by choosing a zone of thickness compatible with the opening capacity of the clamp.
2. Adjust the hose curvature to obtain the desired size of opening. Be careful not to bend the hose too much and to respect a sufficient radius of curvature.
3. Position the second clamp on the second leaf, over an area of compatible thickness, then adjust the position and tighten the locking knobs on each ball joint.